CSS
Last class our pages worked but were plain: black text, white background, the browser’s default font. That is because HTML only ever says what each piece of content is, never how it should look. The second half of the web, its colors, fonts, spacing, and layout, is a separate language called CSS, short for Cascading Style Sheets, and it is today’s job.
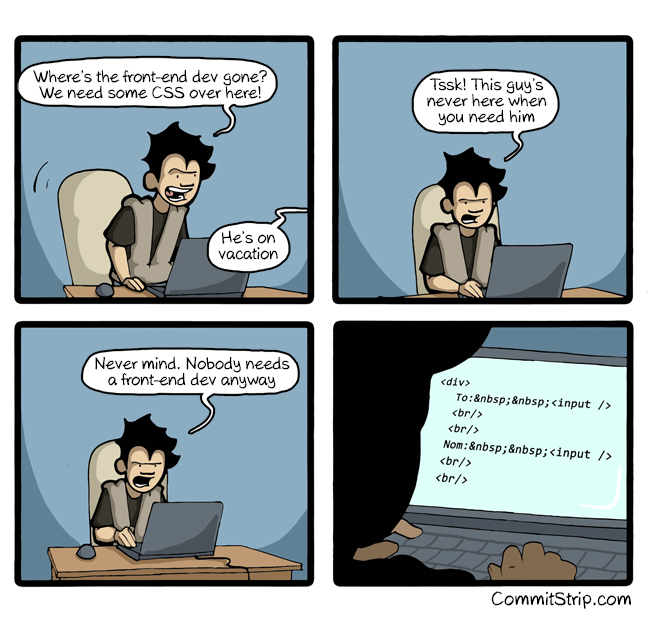
It is tempting to treat the look of a page as decoration you can skip, but the look is the product for most of the web, and the people who dismiss front-end work tend to be the ones who cannot do it.
We are only going to cover a slice of CSS: enough to style your first project and, more importantly, enough to learn the one idea that matters most for the rest of the course: the selector. The same selectors that pick which elements to color today are how we will pick which elements to extract when we scrape web pages later in the term. Learn selectors well now and web scraping comes much easier later.
A rule
CSS is a list of rules, and every rule has the same two parts: a selector that chooses which elements the rule applies to, and a declaration block in curly braces that says what to do to them. The simplest rule turns the text of every paragraph teal:
p {
    color: teal;
}
p is the selector, and it chooses every <p> element on the page; inside the braces, color: teal; is one declaration, setting the color property to the value teal. Every declaration is a property: value; pair, and you can stack as many as you like inside the braces, each ended by a semicolon. This rule turns the text of every paragraph teal, and it does so no matter how many paragraphs there are or where they sit on the page.
Where does this text live? You can write CSS three ways, but only one is worth your habit. You can put it inline on a single element, or in a <style> block in the page’s <head>, or, best of all, in a separate file that every page shares. Put your rules in a file called style.css and link it from the <head> of each HTML page:
<head>
    <title>My First Page</title>
    <link rel="stylesheet" href="style.css">
</head>
The <link> element pulls style.css into the page, so one edit to that file restyles every page that links it. That shared-file discipline is the whole reason CSS is separate from HTML: content in the .html files, appearance in one .css file, and a hundred pages can change their look together. Your first project will require exactly this setup.
Selectors
The selector is the interesting half, because choosing which elements to style is most of the work. The simplest selector is the type selector we already saw: a tag name like p or h1 selects every element of that type. But you rarely want every paragraph; you want these paragraphs. For that, HTML lets you tag elements with two special attributes, and CSS gives you a selector for each.
A class is a reusable label you can put on any number of elements. You add it in the HTML with the class attribute, and you select it in CSS with a dot:
<p class="bold">This paragraph is bold.</p>
<span class="bold">So is this span.</span>
.bold {
font-weight: bold;
}The .bold selector matches every element whose class is bold, regardless of its tag, so the paragraph and the span both go bold. Classes are the workhorse: use them whenever a style applies to a group of elements.
An id is the opposite: a name that must be unique on the page, for the one element you mean specifically. You add it with the id attribute and select it with a hash:
<h1 id="top">Welcome</h1>#top {
color: teal;
}The #top selector matches the single element with that id. The rule of thumb is simple: a class is a category (“all the warnings”), an id is a name (“the site header”).
Combinators, and the document tree
So far each selector has looked at one element in isolation. The real power of selectors is choosing an element by where it sits relative to others, and to do that you have to see your HTML the way the browser does: as a tree.
Every element is nested inside another, so the whole page forms a family tree. Take this fragment:
<body>
    <h1>Lorem <span class="bold">Ipsum</span></h1>
    <p class="bold">dolor sit amet</p>
</body>
Drawn as a tree, its structure is:
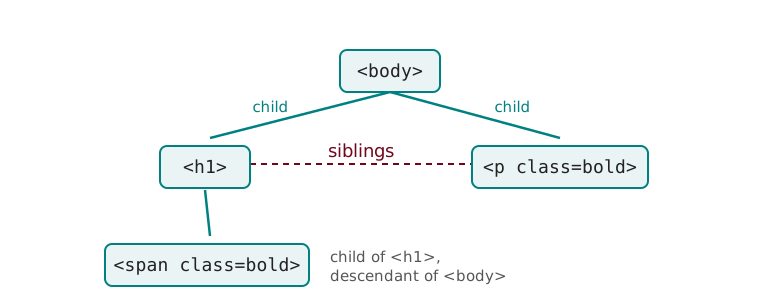
The vocabulary is exactly the family one. <body> is the parent of both <h1> and <p>; those two are siblings because they share a parent; the <span> is a child of <h1> and a descendant of <body> (a child, or a child’s child, or deeper). Once you can see this tree, four combinators let you select by relationship:
h1 spanselects a descendant (note the space): every<span>somewhere inside an<h1>, at any depth.h1 > spanselects a child: every<span>that is a direct child of an<h1>, one level down.h1 + pselects an adjacent sibling: the<p>that comes immediately after an<h1>, sharing a parent.h1 ~ pselects a general sibling: every<p>that comes after an<h1>under the same parent.
The space versus the > is the distinction beginners miss most, so hold it firmly: body span matches our <span> (it is a descendant of <body>), but body > span matches nothing, because the <span> is a child of <h1>, not of <body>. Two selectors that look almost identical select completely different sets.
Two more pieces finish the toolkit. You can group selectors with a comma to give several the same rule: h1, h2, p { color: teal; } styles all three, and you can select by any attribute in square brackets, like [src="cat.jpg"] for the image with that source. Grouping is where a stray comma bites: p .bold (descendant) and p, .bold (two grouped selectors) mean different things, and the only difference is the comma.
Counting matches
The exercise that builds real fluency, and the one your quiz is built from, is this: given a selector and a chunk of HTML, how many elements does it match? You do not have to guess. Every browser can answer for you. Open any page’s developer tools with F12, go to the Console, and run:
document.querySelectorAll('h1 ~ p')The browser hands back exactly the list of elements that selector matches on the current page. Predict the count yourself first, then run it and check, that predict-then-run loop is how selectors move from “I read about them” to “I know them.” The quiz will hand you a page of HTML and a list of selectors and ask for the counts, so work through the practice quiz, which has two problems, each with its own page of HTML. Write your counts down first, then check them against the answers, every count there was computed by actually running the selector against the page, so where you disagree, it is worth working out why. The real quiz reuses the HTML from Problem 2.
The cascade
There is one question left: when two rules set the same property on the same element, which wins? That question is the “cascading” in Cascading Style Sheets, and it has a definite answer.
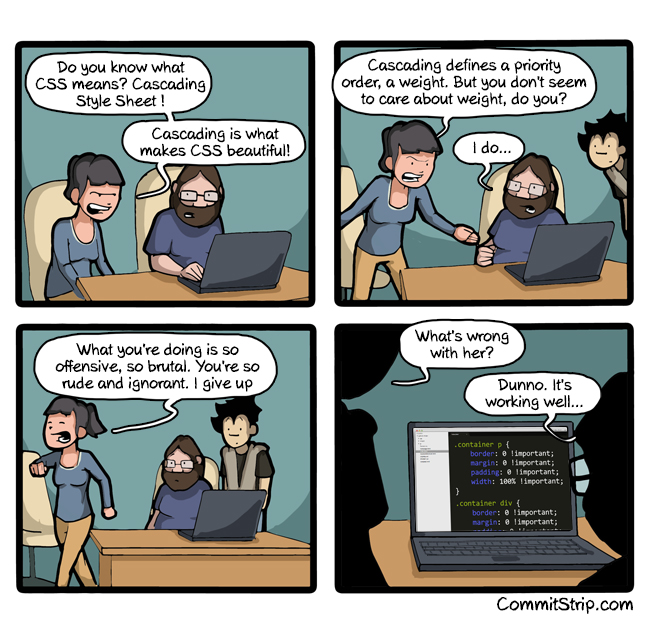
The cascade resolves conflicts by specificity: a more specific selector beats a less specific one. An id selector beats a class selector, and a class selector beats a type selector, because naming one element is more specific than naming a category, which is more specific than naming every tag. When two selectors tie on specificity, the one written later in the file wins. So given p { color: black; } and #top { color: teal; }, the element with id top comes out teal even though both rules apply, because the id is more specific.
There is an escape hatch, !important, that forces a declaration to win regardless of specificity, and the comic above is a warning about it rather than a model to copy. Reaching for !important to win a fight you could have won with a better selector is how a stylesheet rots into a pile of overrides nobody can reason about. Prefer to fix the specificity; keep !important for genuine emergencies.
Enough to style a project
You now have selectors; here are just enough properties to make your first project look intentional. Set text and background colors with color and background-color, and react to the mouse with the :hover pseudo-class, which selects an element only while the pointer is over it:
a {
    color: teal;
}
a:hover {
    background-color: #f2d6d9;
}
links are teal, and while you hover a link, it also gets a pale red background, which snaps off when the pointer leaves. The last property worth meeting today makes a page adapt to phones. A @media rule wraps other rules and applies them only when a condition holds, such as a narrow screen:
@media (max-width: 600px) {
    body {
        font-size: 14px;
    }
}
On a screen 600 pixels wide or narrower, the text shrinks; on anything wider, this block does nothing. That is the seed of responsive design, and your project rubric asks for one such rule. When you need a property we did not cover, and you will, reach for the CSS cheatsheet or Shay Howe’s Getting to Know CSS; looking things up is the job.
Looking forward
We came for good-looking pages and we got them, but the selector is what lasts. When we reach web scraping, a page you did not write becomes a tree exactly like the one above, and you will pull the data you want out of it by writing selectors like div > .price and a[href], the very same syntax you just used to color your own. We will say so again when we get there.
Next class we leave the browser for the language the rest of the course is built on: Python. HTML and CSS describe things; Python does things, and that shift is where the real automating begins. Before then, put HTML and CSS together into a site of your own (that is Project 0), and study for the selector quiz on paper, the way you will take it.